Connect Your WhatsApp Account
Before you can send messages, broadcast, or run chatbots, you need to connect at least one WhatsApp account to Wabot.
The Web-only bots and widgets account card is currently marked Coming Soon unless your workspace has been enabled for it. Use the supported WhatsApp account connection options shown in your workspace. You need account-add permission to open the connection flow. The Unofficial API/QR option is hidden when your workspace does not have Unofficial API access.
Navigate to Accounts
- In the sidebar, click Accounts (under GENERAL).
- You'll see a list of your connected accounts. On a fresh account, you'll see: "No WhatsApp accounts".
- Click Add Account at the top right.
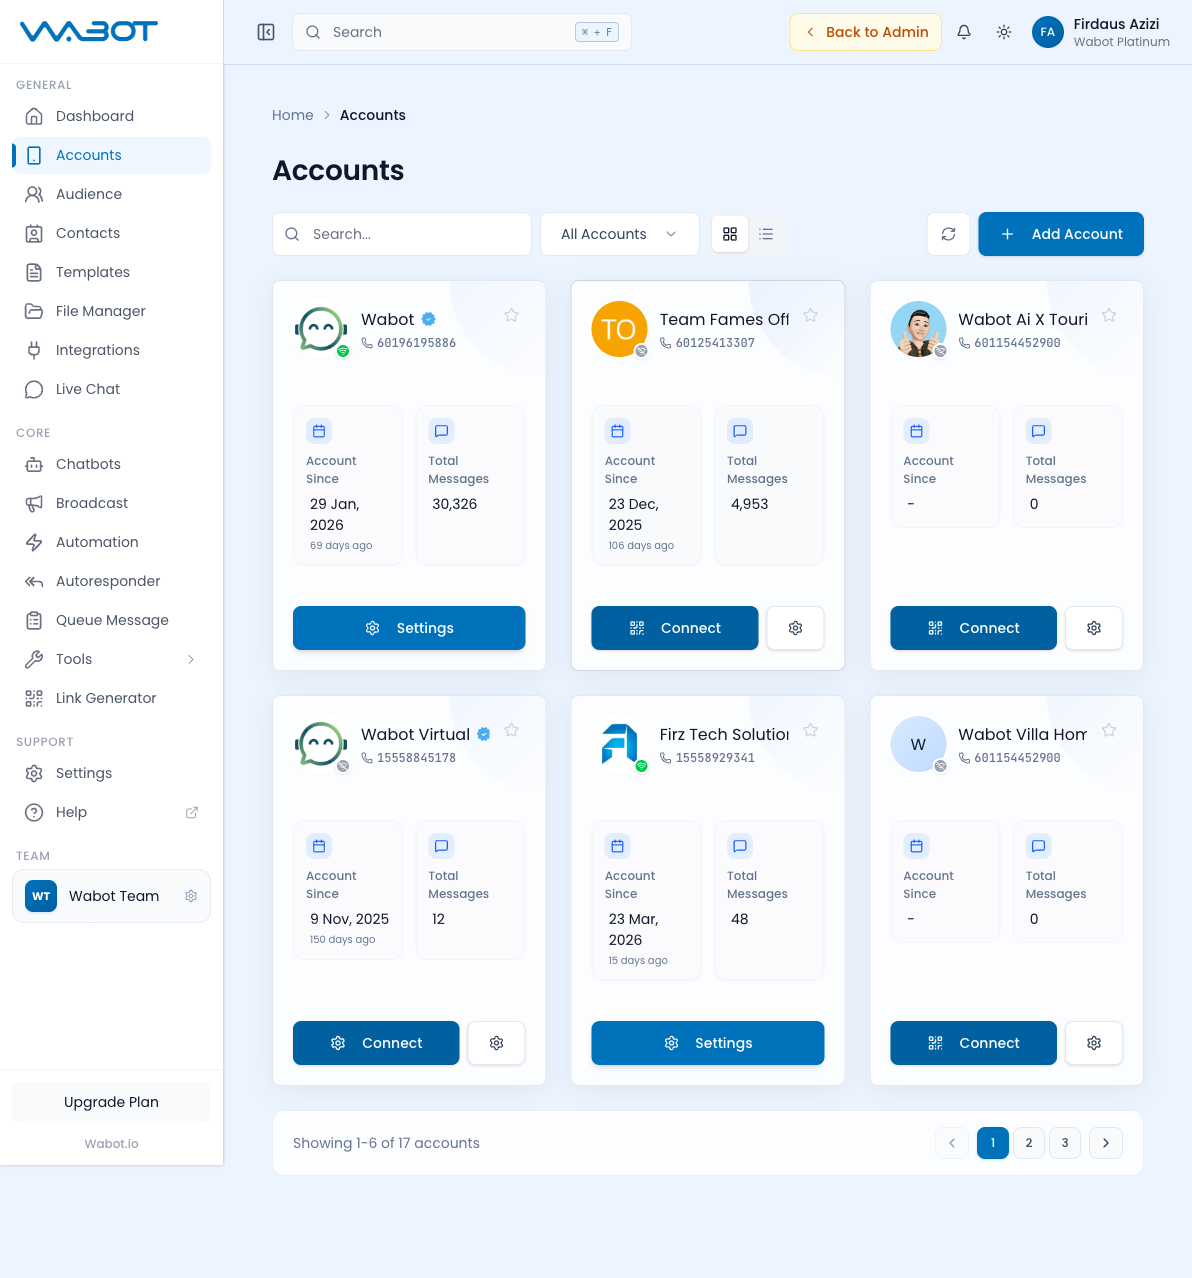
You'll land on the Add Account page. The available connection methods are shown there.
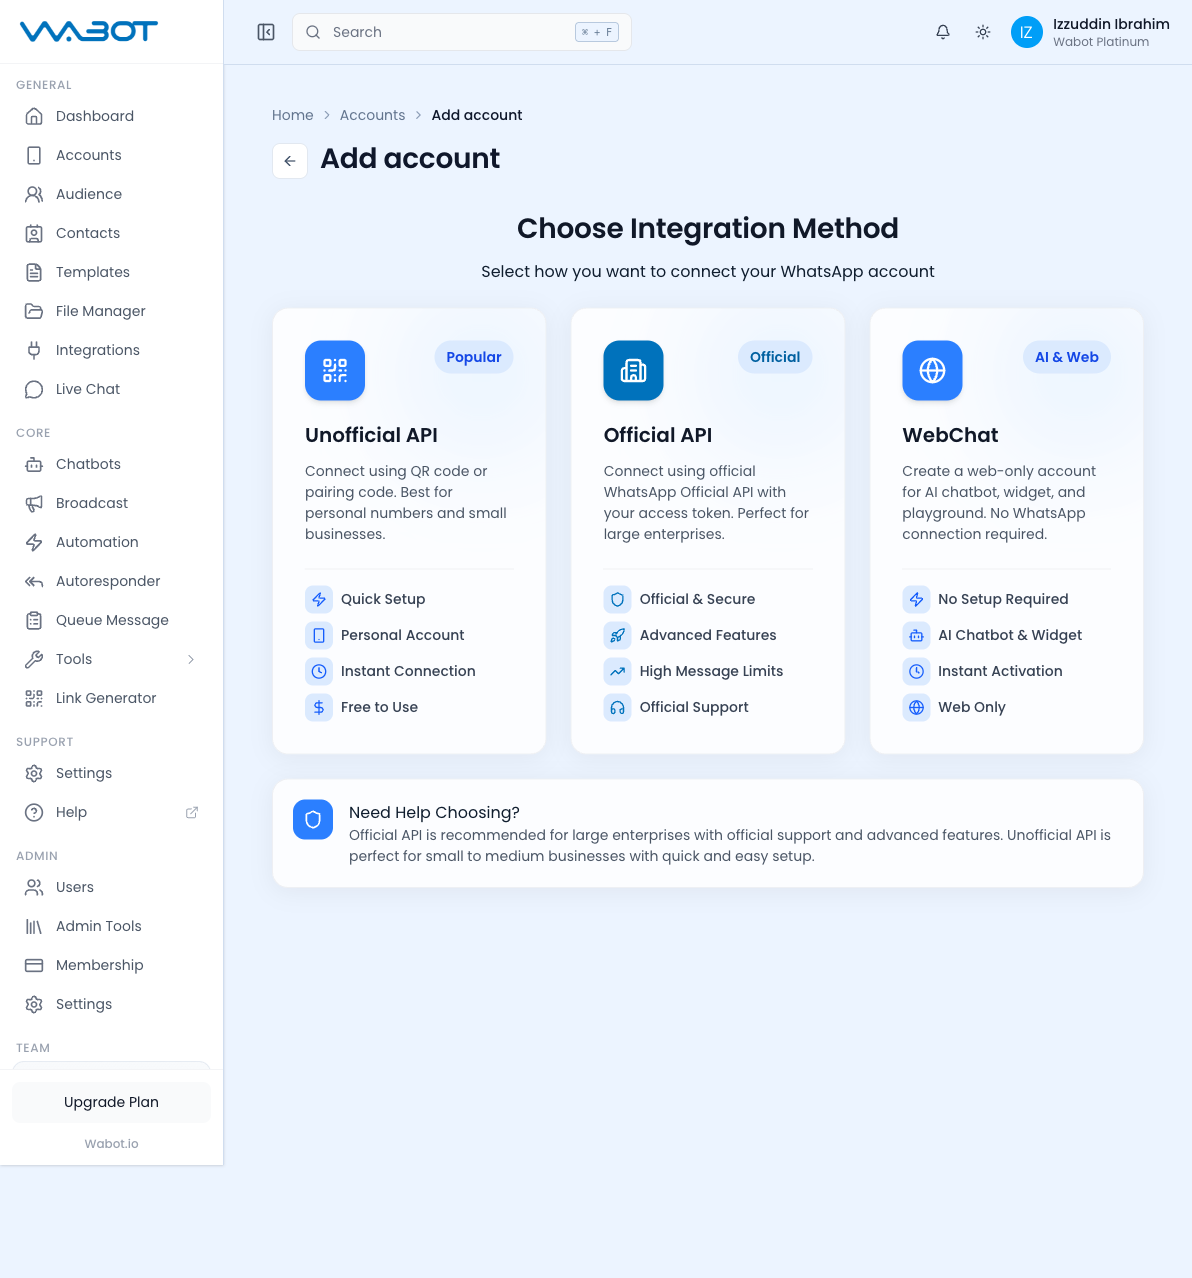
Choose Integration Method
- Unofficial API (Popular)
- Official API
- WebChat (Coming soon)
Best for: Personal numbers, small to medium businesses.
Features:
- ✅ Quick Setup
- ✅ Personal Account
- ✅ Instant Connection
- ✅ Free to Use
How to connect:
- Click the Unofficial API card.
- Enter a name for the account (e.g. "Main Sales Number").
- Click Connect with QR Code (or Pairing Code).
- A QR code appears on screen.
- On your phone, open WhatsApp → Settings → Linked Devices → Link a Device.
- Scan the QR code shown on Wabot.
- Wait until the status turns to Connected / Online in the dashboard.
Use a dedicated business number, not your personal WhatsApp. Once connected, Wabot runs the session on its own servers 24/7 — your phone doesn't need to stay online after the first scan.
Best for: Large enterprises with verified WhatsApp Business accounts.
Features:
- ✅ Official & Secure
- ✅ Advanced Features
- ✅ High Message Limits
- ✅ Official Meta Support
Requirements:
- Verified WhatsApp Business Account (WABA) with Meta
- Access token from Meta Business Manager
- Phone number ID
- Pre-approved message templates (for marketing use)
How to connect:
- Click the Official API card.
- Enter your WABA credentials:
- Access Token
- Phone Number ID
- Business Account ID
- Click Connect.
- Wabot will verify and activate the account.
- Sync your pre-approved templates from Templates → Pre-Approved → Sync.
Status: The product card is visible on the current Add Account page, but it is disabled and labelled Coming soon. You cannot create a standalone WebChat account from this screen yet.
The card describes the planned experience: a web-only bot and widget with no WhatsApp number. Do not rely on it for a live setup until Wabot enables the option.
What you can use today:
- Connect an Unofficial API or Official API account.
- Open Chatbots, select that account, then choose Widget Setting.
- Configure and deploy its web widget from there.
See Chatbots → Widget Settings for the supported deployment flow.
After Connecting
Once the account shows Connected:
- It appears in the Accounts list with a green status indicator.
- You can now use it in Chatbots, Broadcasts, Automations, and Live Chat.
- Manage its settings (name, profile picture, auto-reply) by clicking the account card.
The Add Account page currently offers two working connection methods: Unofficial API and Official API. WebChat is presented as a future option.
Managing Multiple Accounts
- Your plan determines how many WhatsApp numbers you can connect:
- Lite / Basic / Plus → 1 number
- Premier → 3 numbers
- Platinum → 10 numbers
- Click Add Account again to connect additional numbers.
- Use the All Accounts dropdown on most pages to switch between them.